
MiniApps Studio
MiniApps Studio
Welcome to Nana MiniApps Studio, a comprehensive integrated development environment (IDE) specifically designed for building, testing, and deploying MiniApps within the Nana ecosystem. This powerful development tool provides developers with a complete toolkit to create seamless, engaging, and high-performance mini-applications.
Key Features
- Integrated Development Environment: Full-featured IDE with syntax highlighting, debugging tools, and project management
- Real-time Testing: Live preview and testing capabilities with QR code integration
- Multi-platform Support: Available for macOS (Apple Silicon & Intel) and Windows
- Template Library: Pre-built templates including React with Taro, TypeScript, Vue.js, and more
- Project Management: Import existing projects or create new ones with guided setup
- Direct Deployment: Seamless upload and version management for your MiniApps
Download Nana MiniApps Studio
Select the appropriate version for your operating system:
macOS
Optimized for M1/M2 Mac processors
Download v2.0.55 (ARM64)
For Intel-based Mac computers
Download v2.0.55 (Intel)
Windows
Compatible with Windows 10 and later
Download v2.0.55 (Windows)
Getting Started Guide
Follow these steps to set up and begin developing with Nana MiniApps Studio:
Step 1: Initial Login Setup
Start by accessing the login functionality located in the bottom-left corner of the application interface.

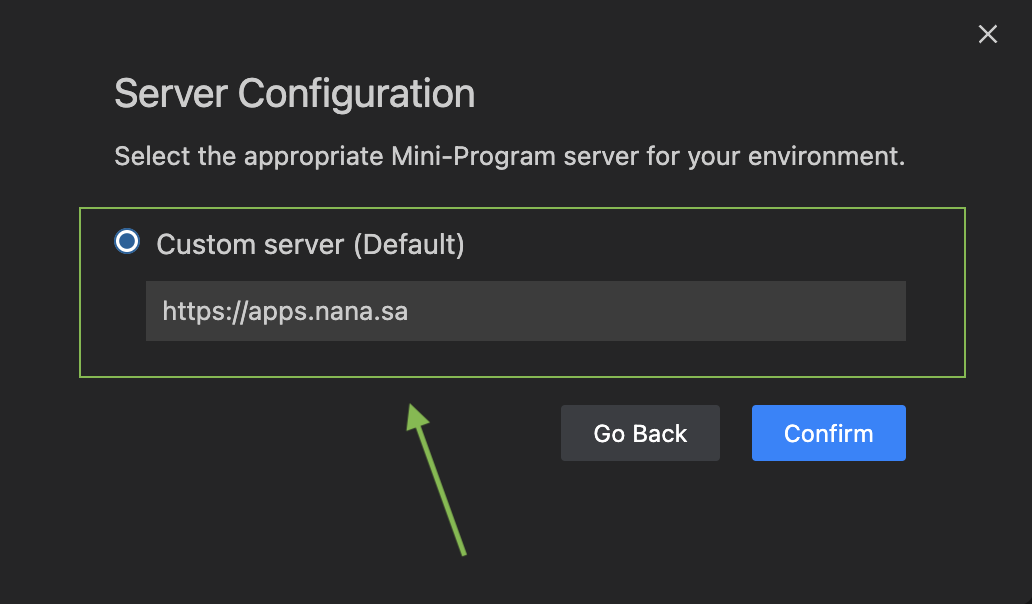
Step 2: Server Configuration
Configure your development server by clicking on Server Configuration to establish connection with the Nana platform.

Step 3: Set Server URL
Enter the Nana platform URL: https://apps.nana.sa and click Confirm to establish the connection.
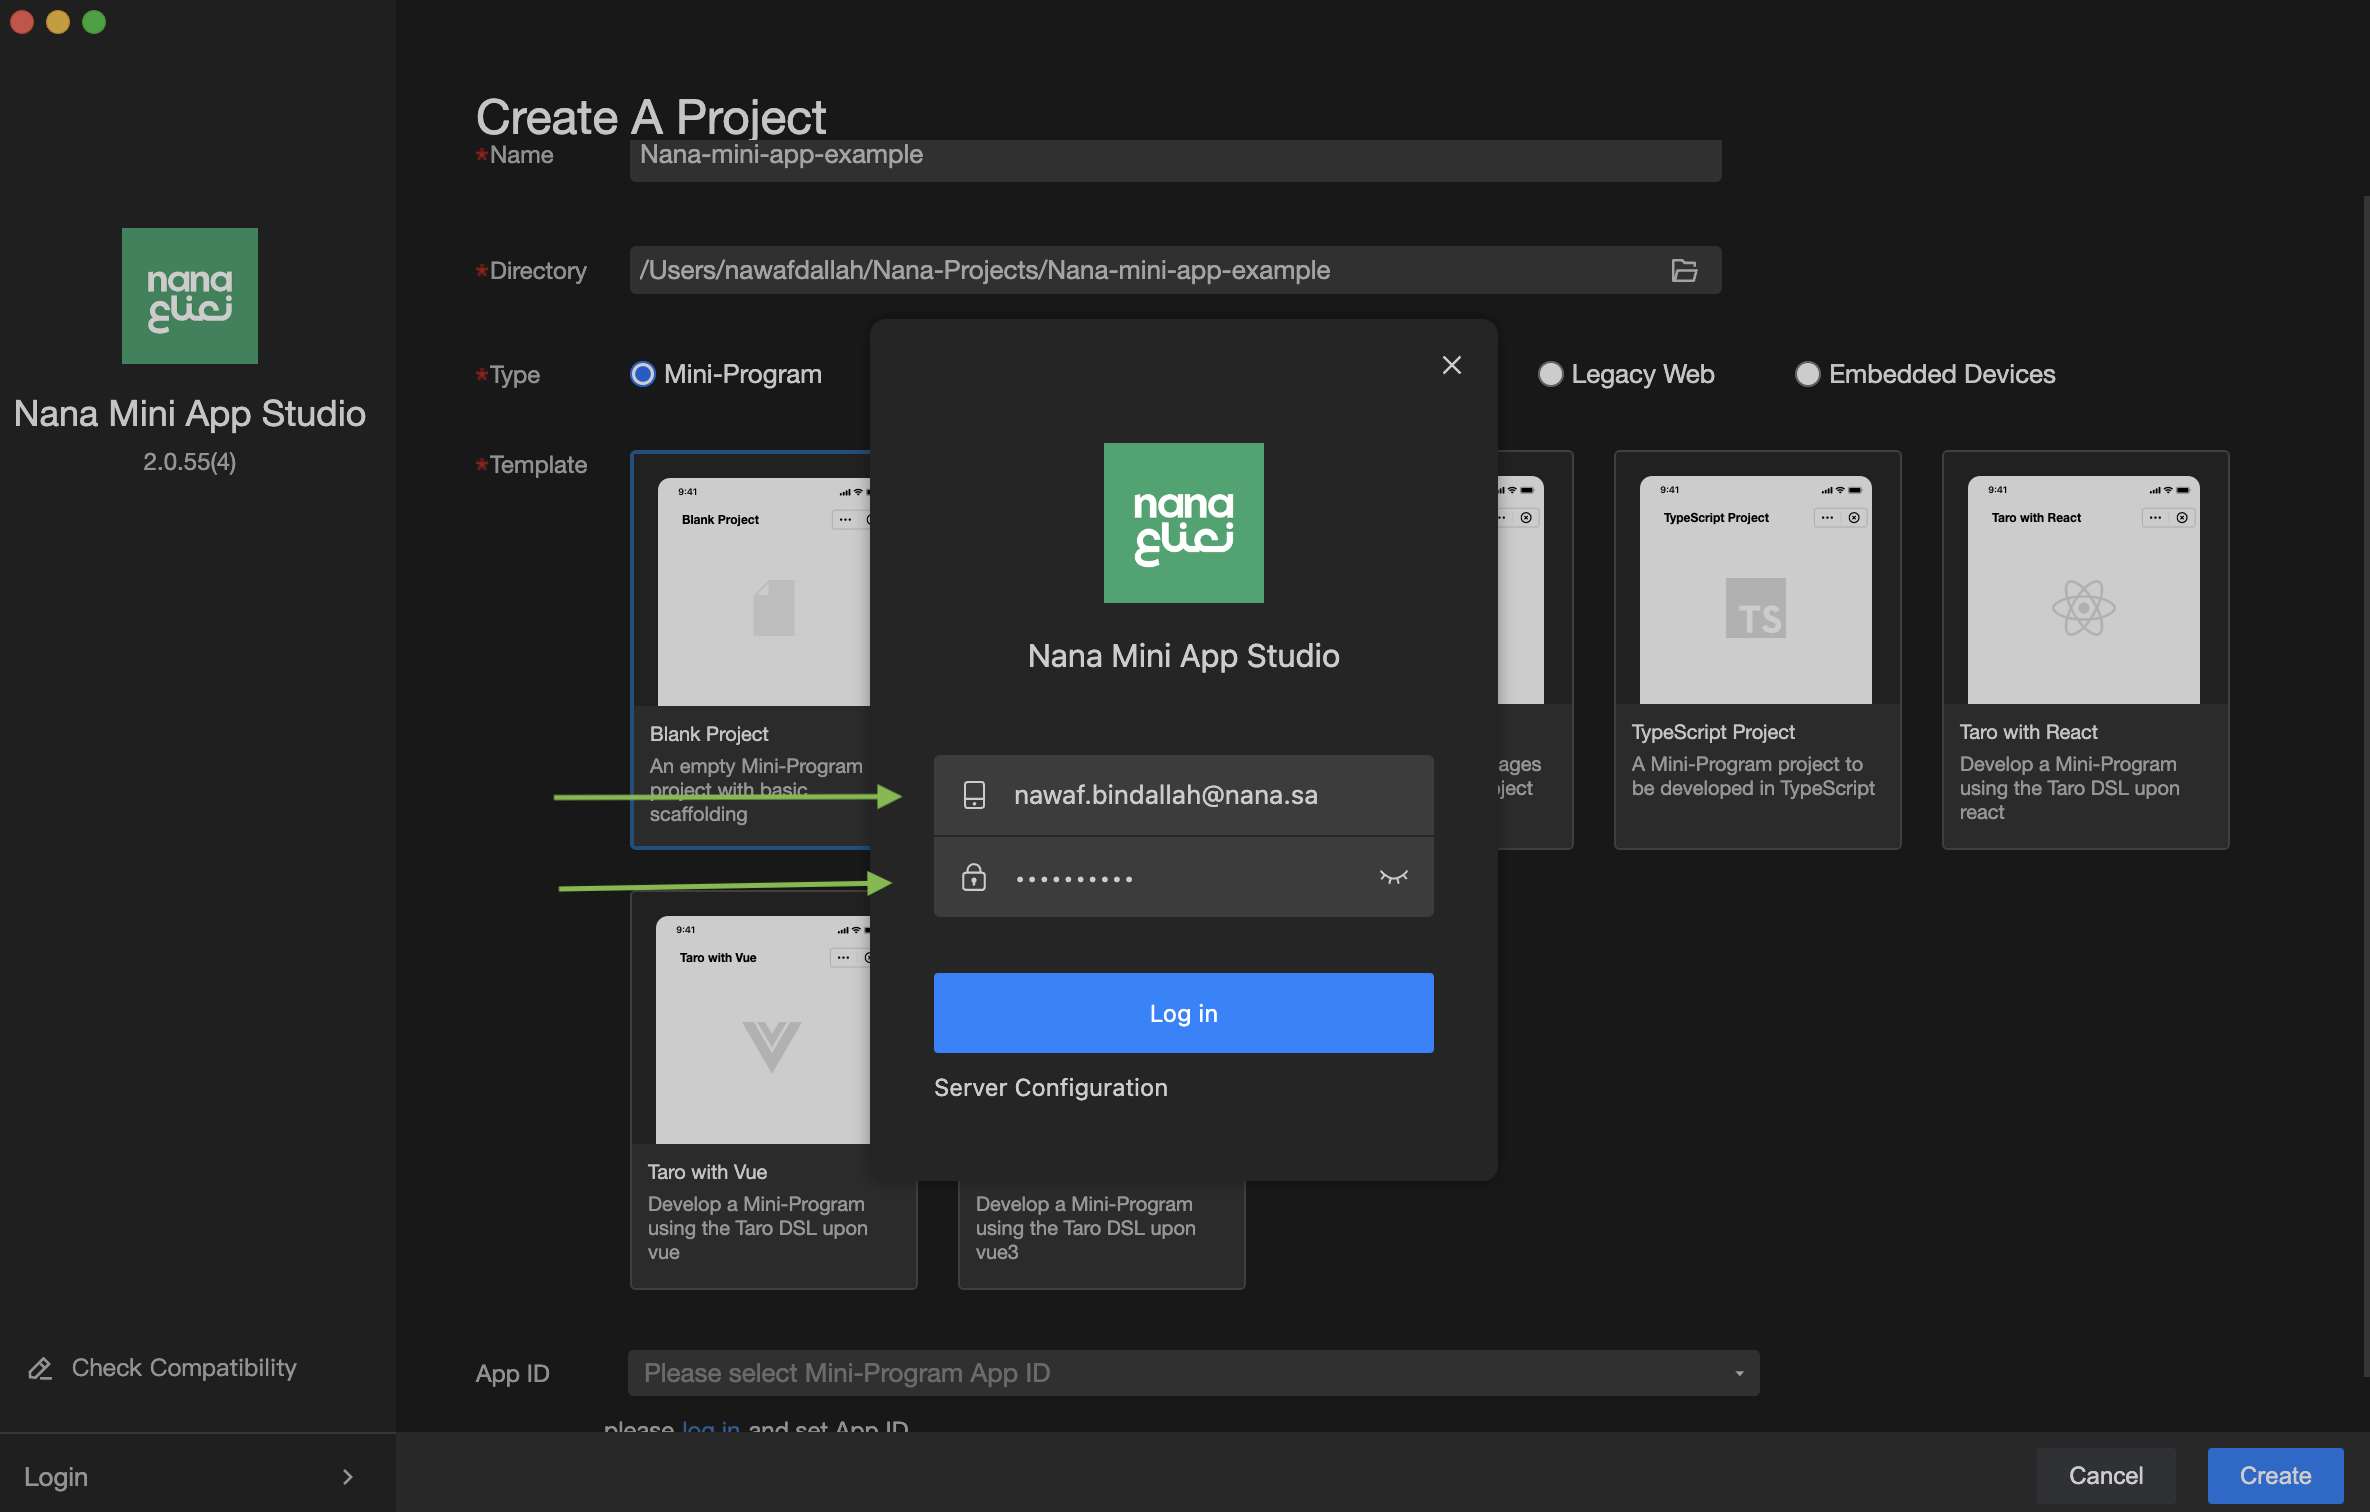
Step 4: Authentication
Enter your Nana developer portal credentials (email and password) to authenticate your session and click Login.
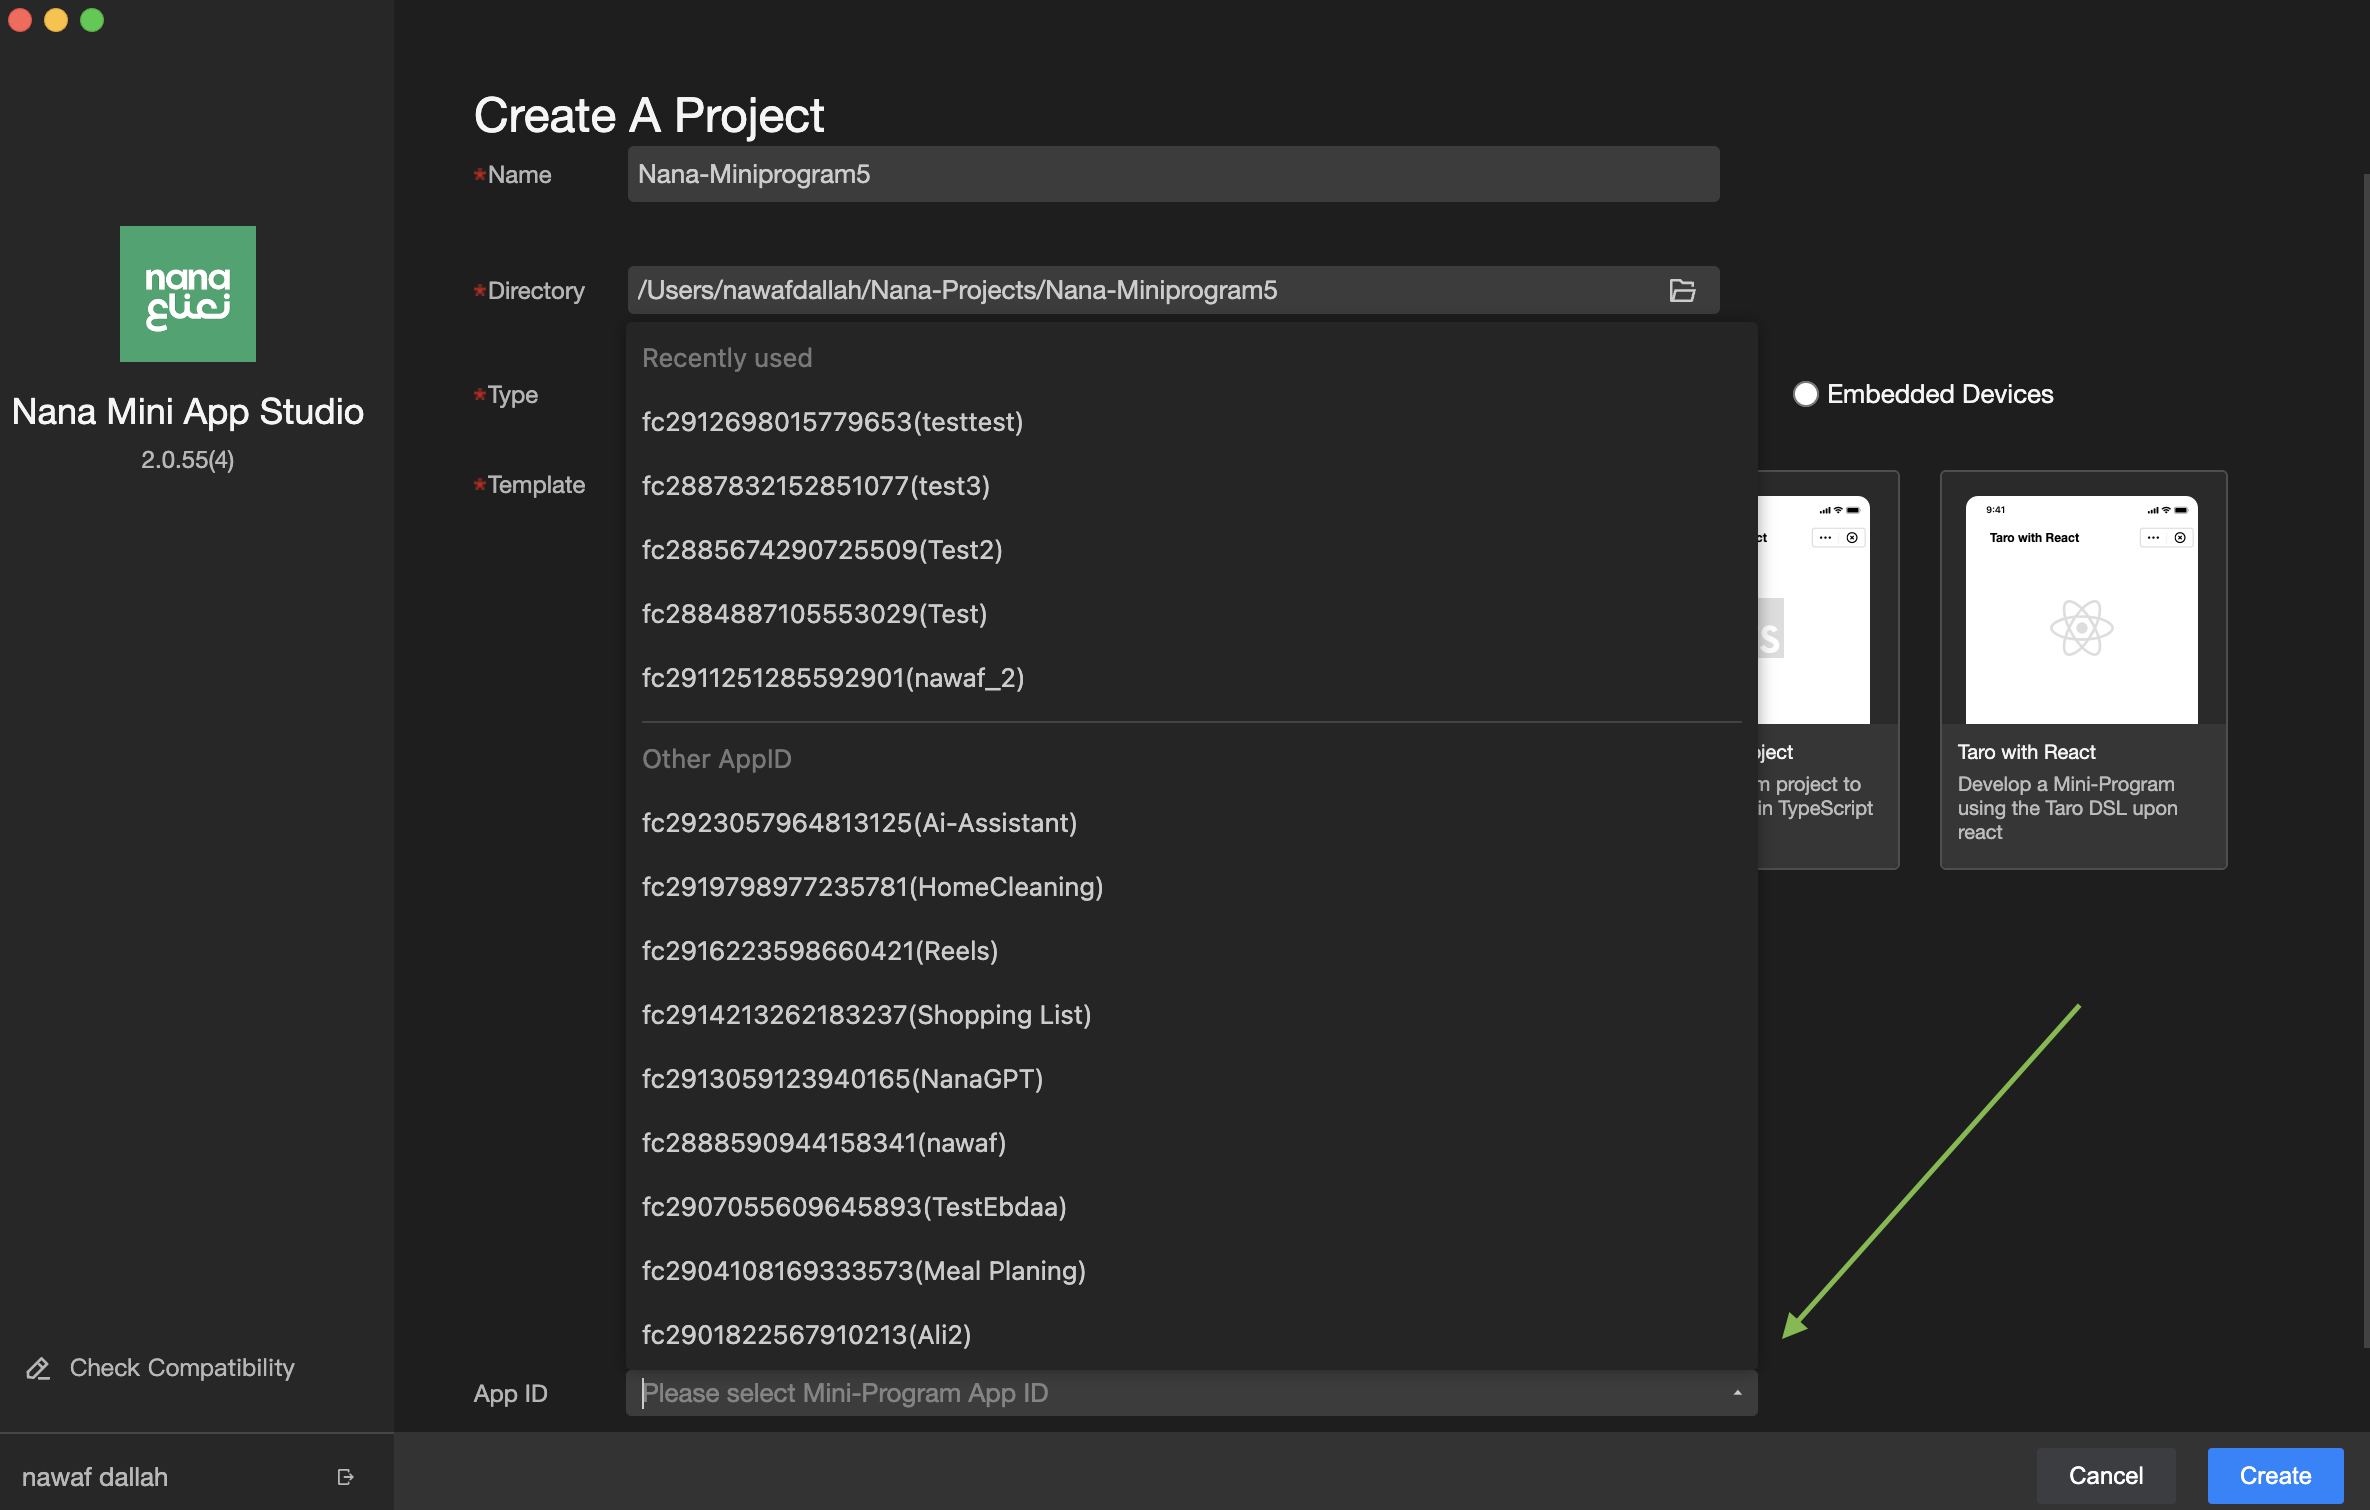
Project Management
Creating a New Project
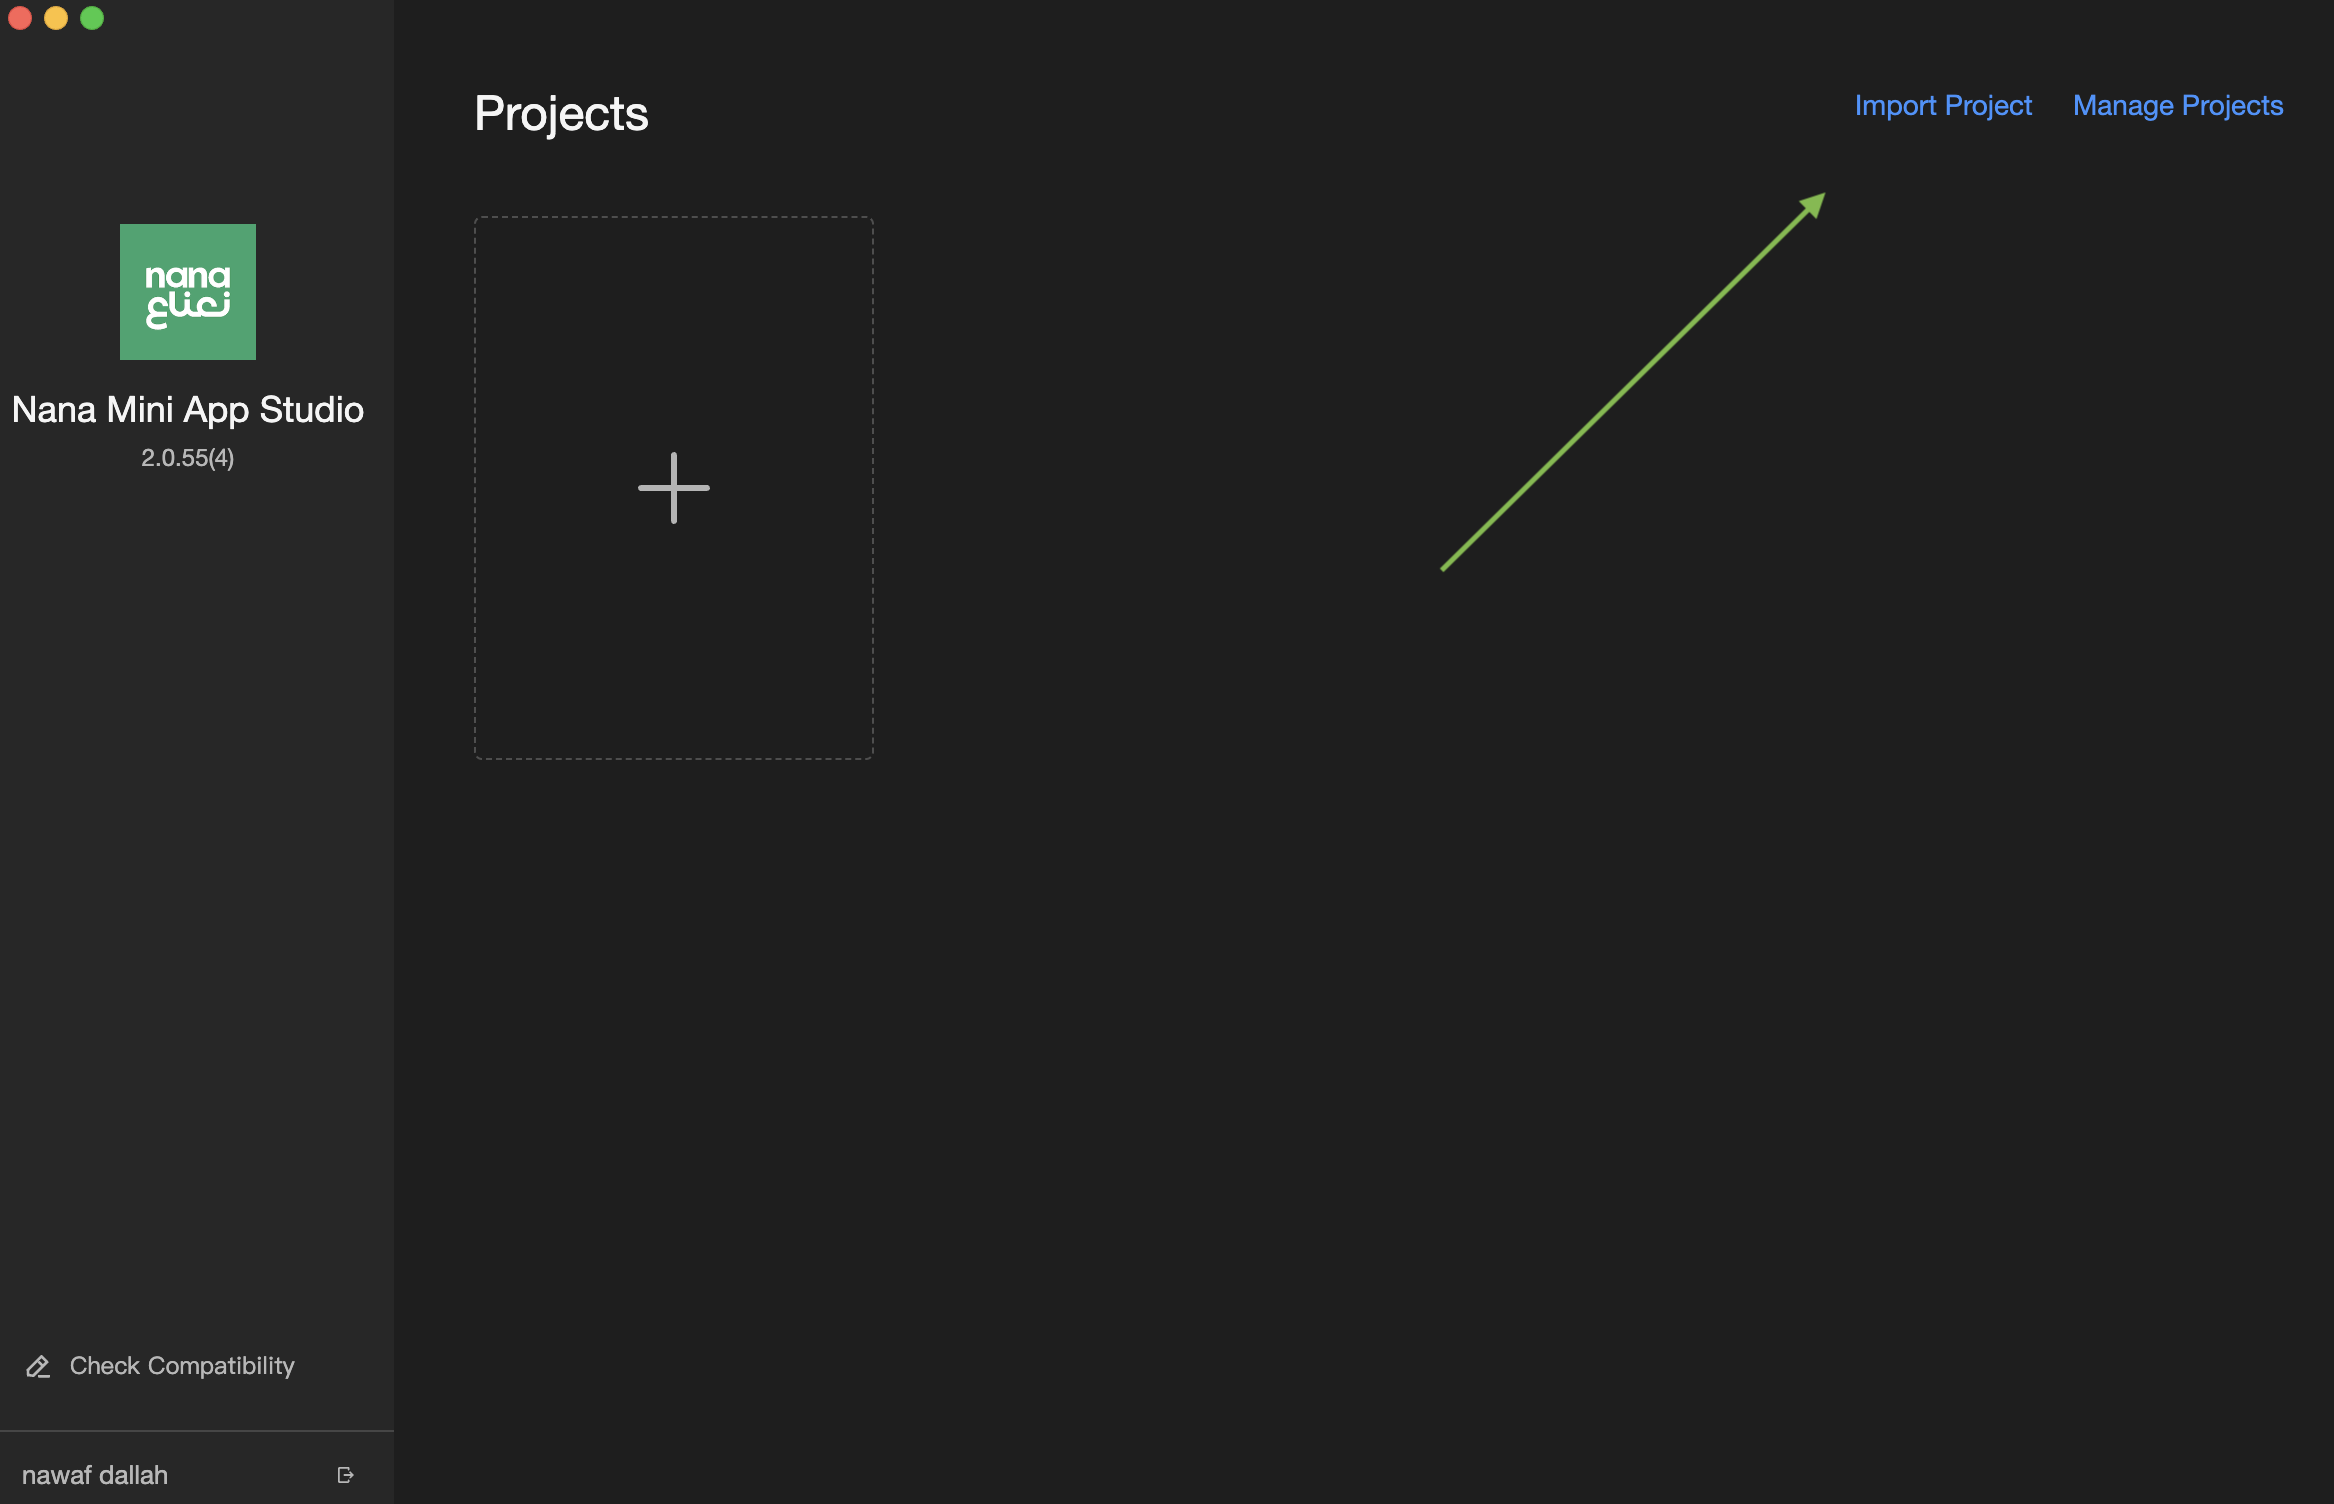
Click the + icon to initiate a new MiniApp project with guided setup options.

Importing Existing Projects
Use Import Project to bring existing MiniApp projects into your development environment.
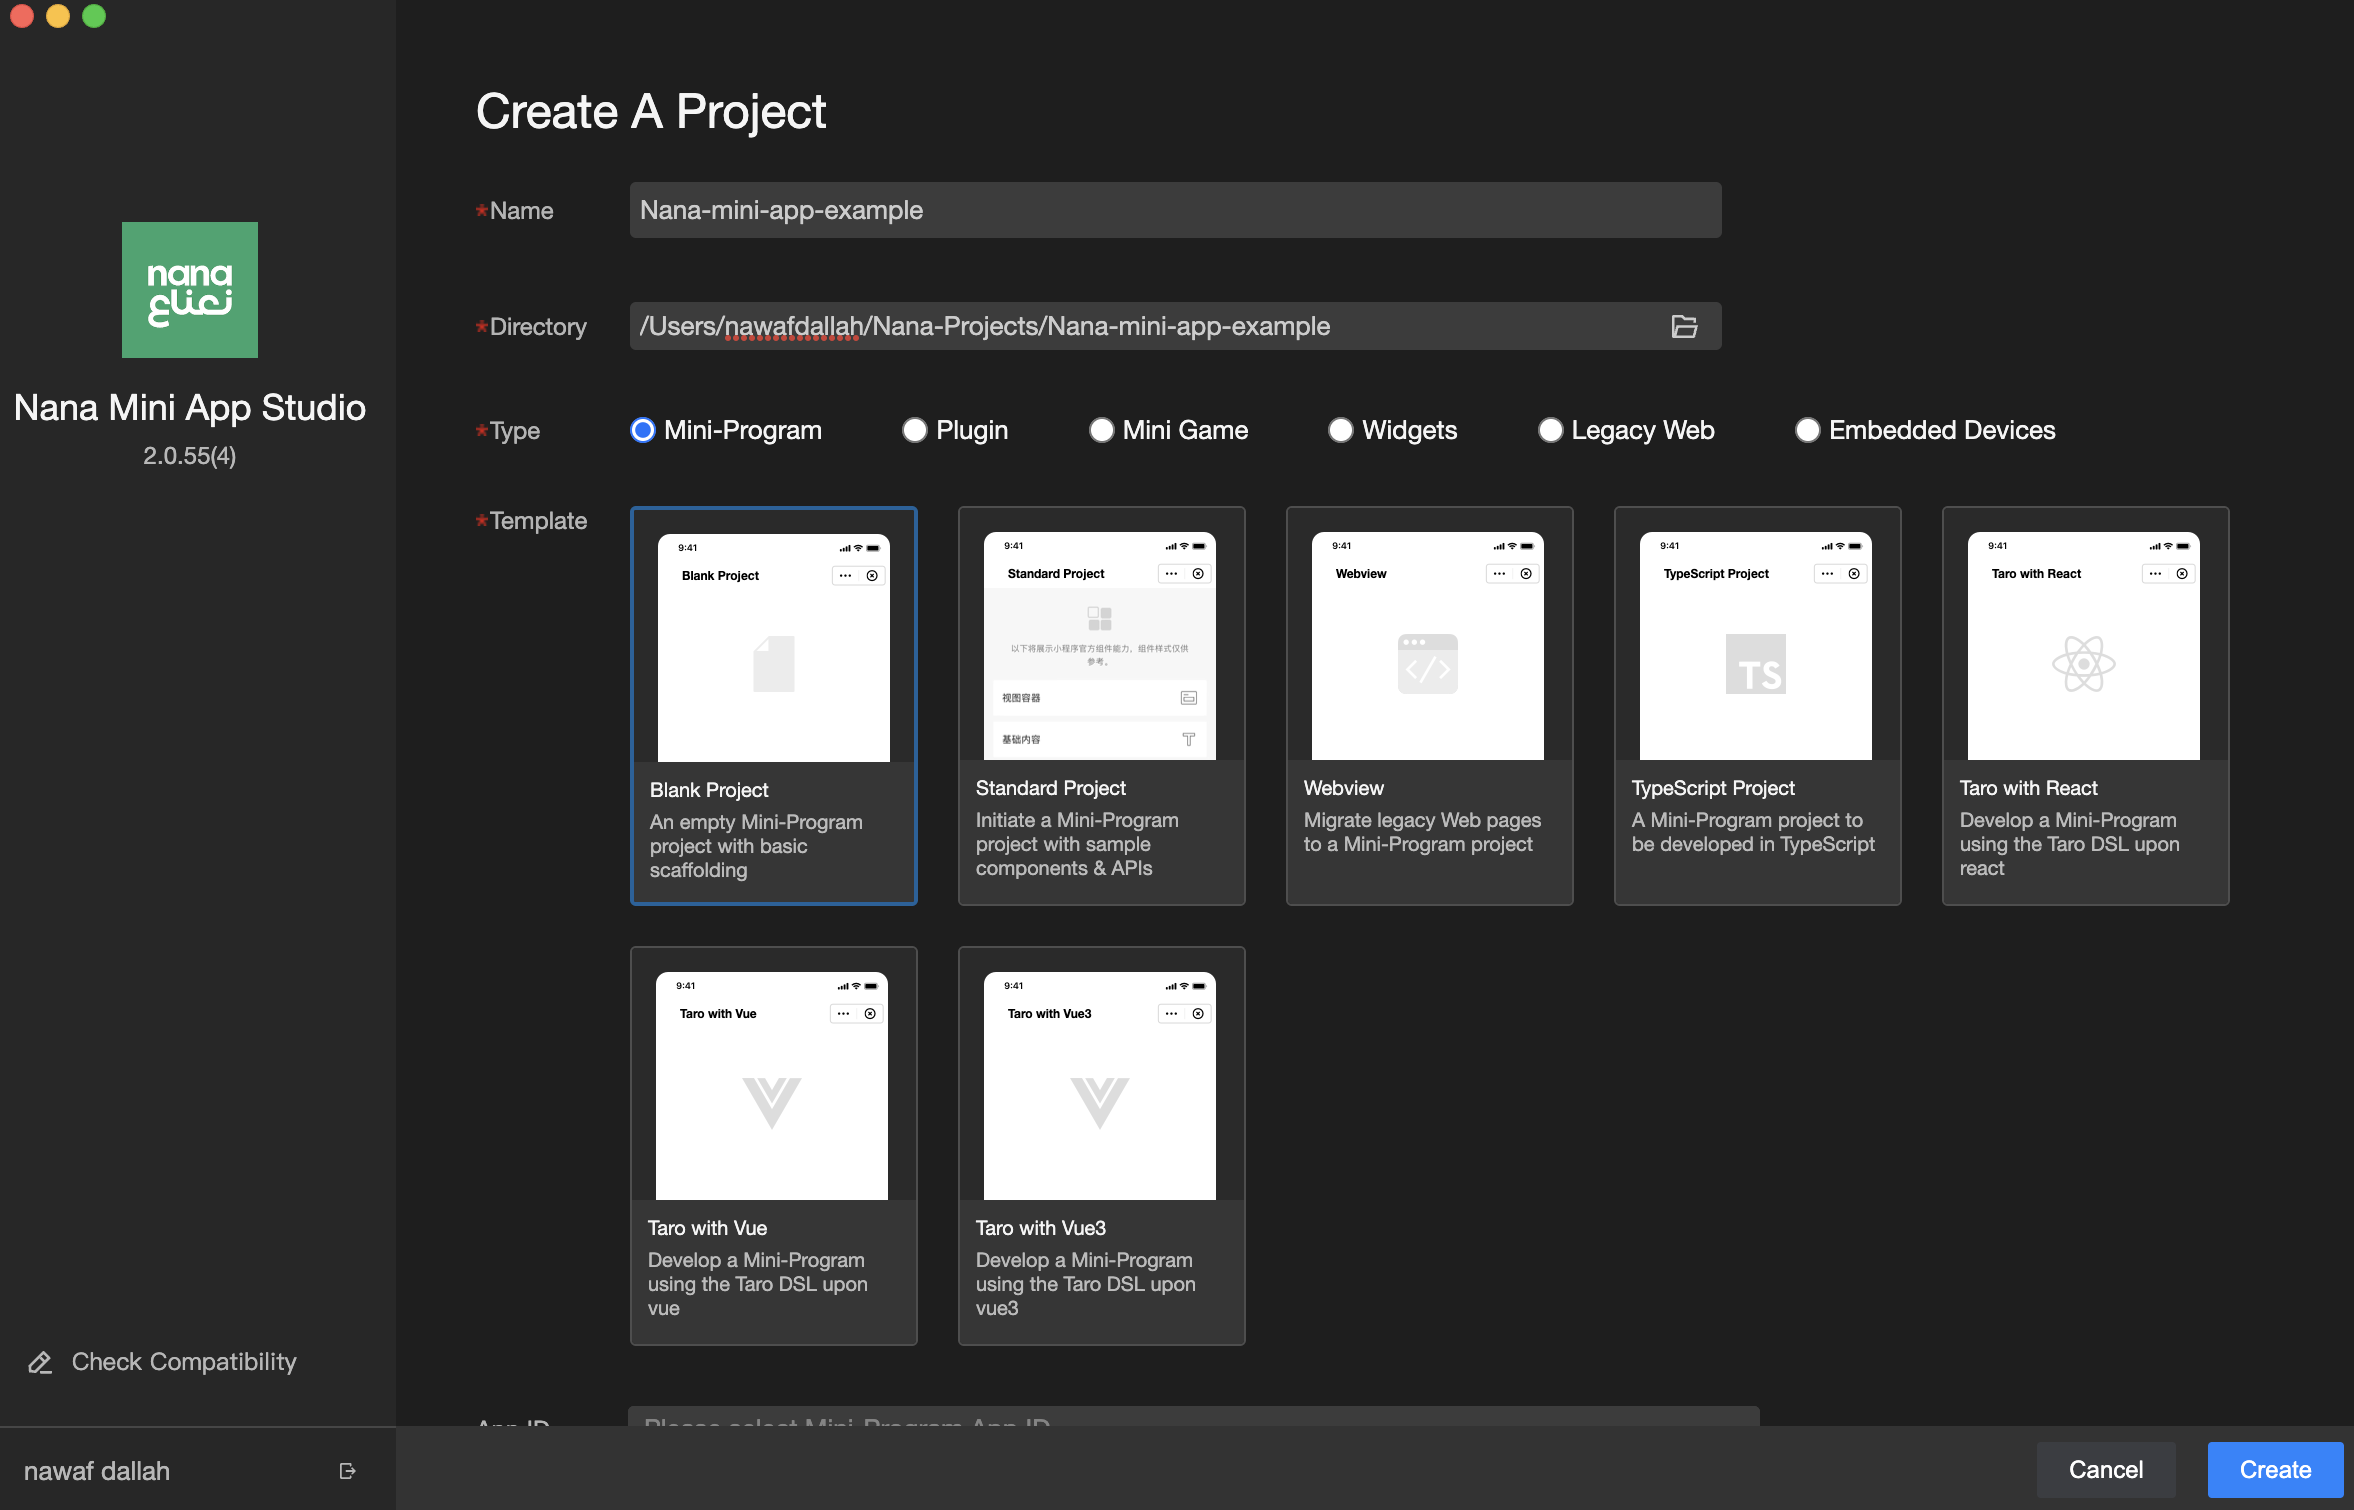
Project Configuration
Configure your project settings including:
- Project Directory: Choose your preferred local development folder
- Project Name: Set a descriptive name for your MiniApp
- Project Type: Select from Mini-Program, Mini-Games, Widgets, and other available types
- Development Framework: Choose from React with Taro, TypeScript, Vue.js, or start with a blank project
MiniApp ID Integration
Link your development project with the corresponding MiniApp ID created in the Nana developer portal for seamless deployment and testing.
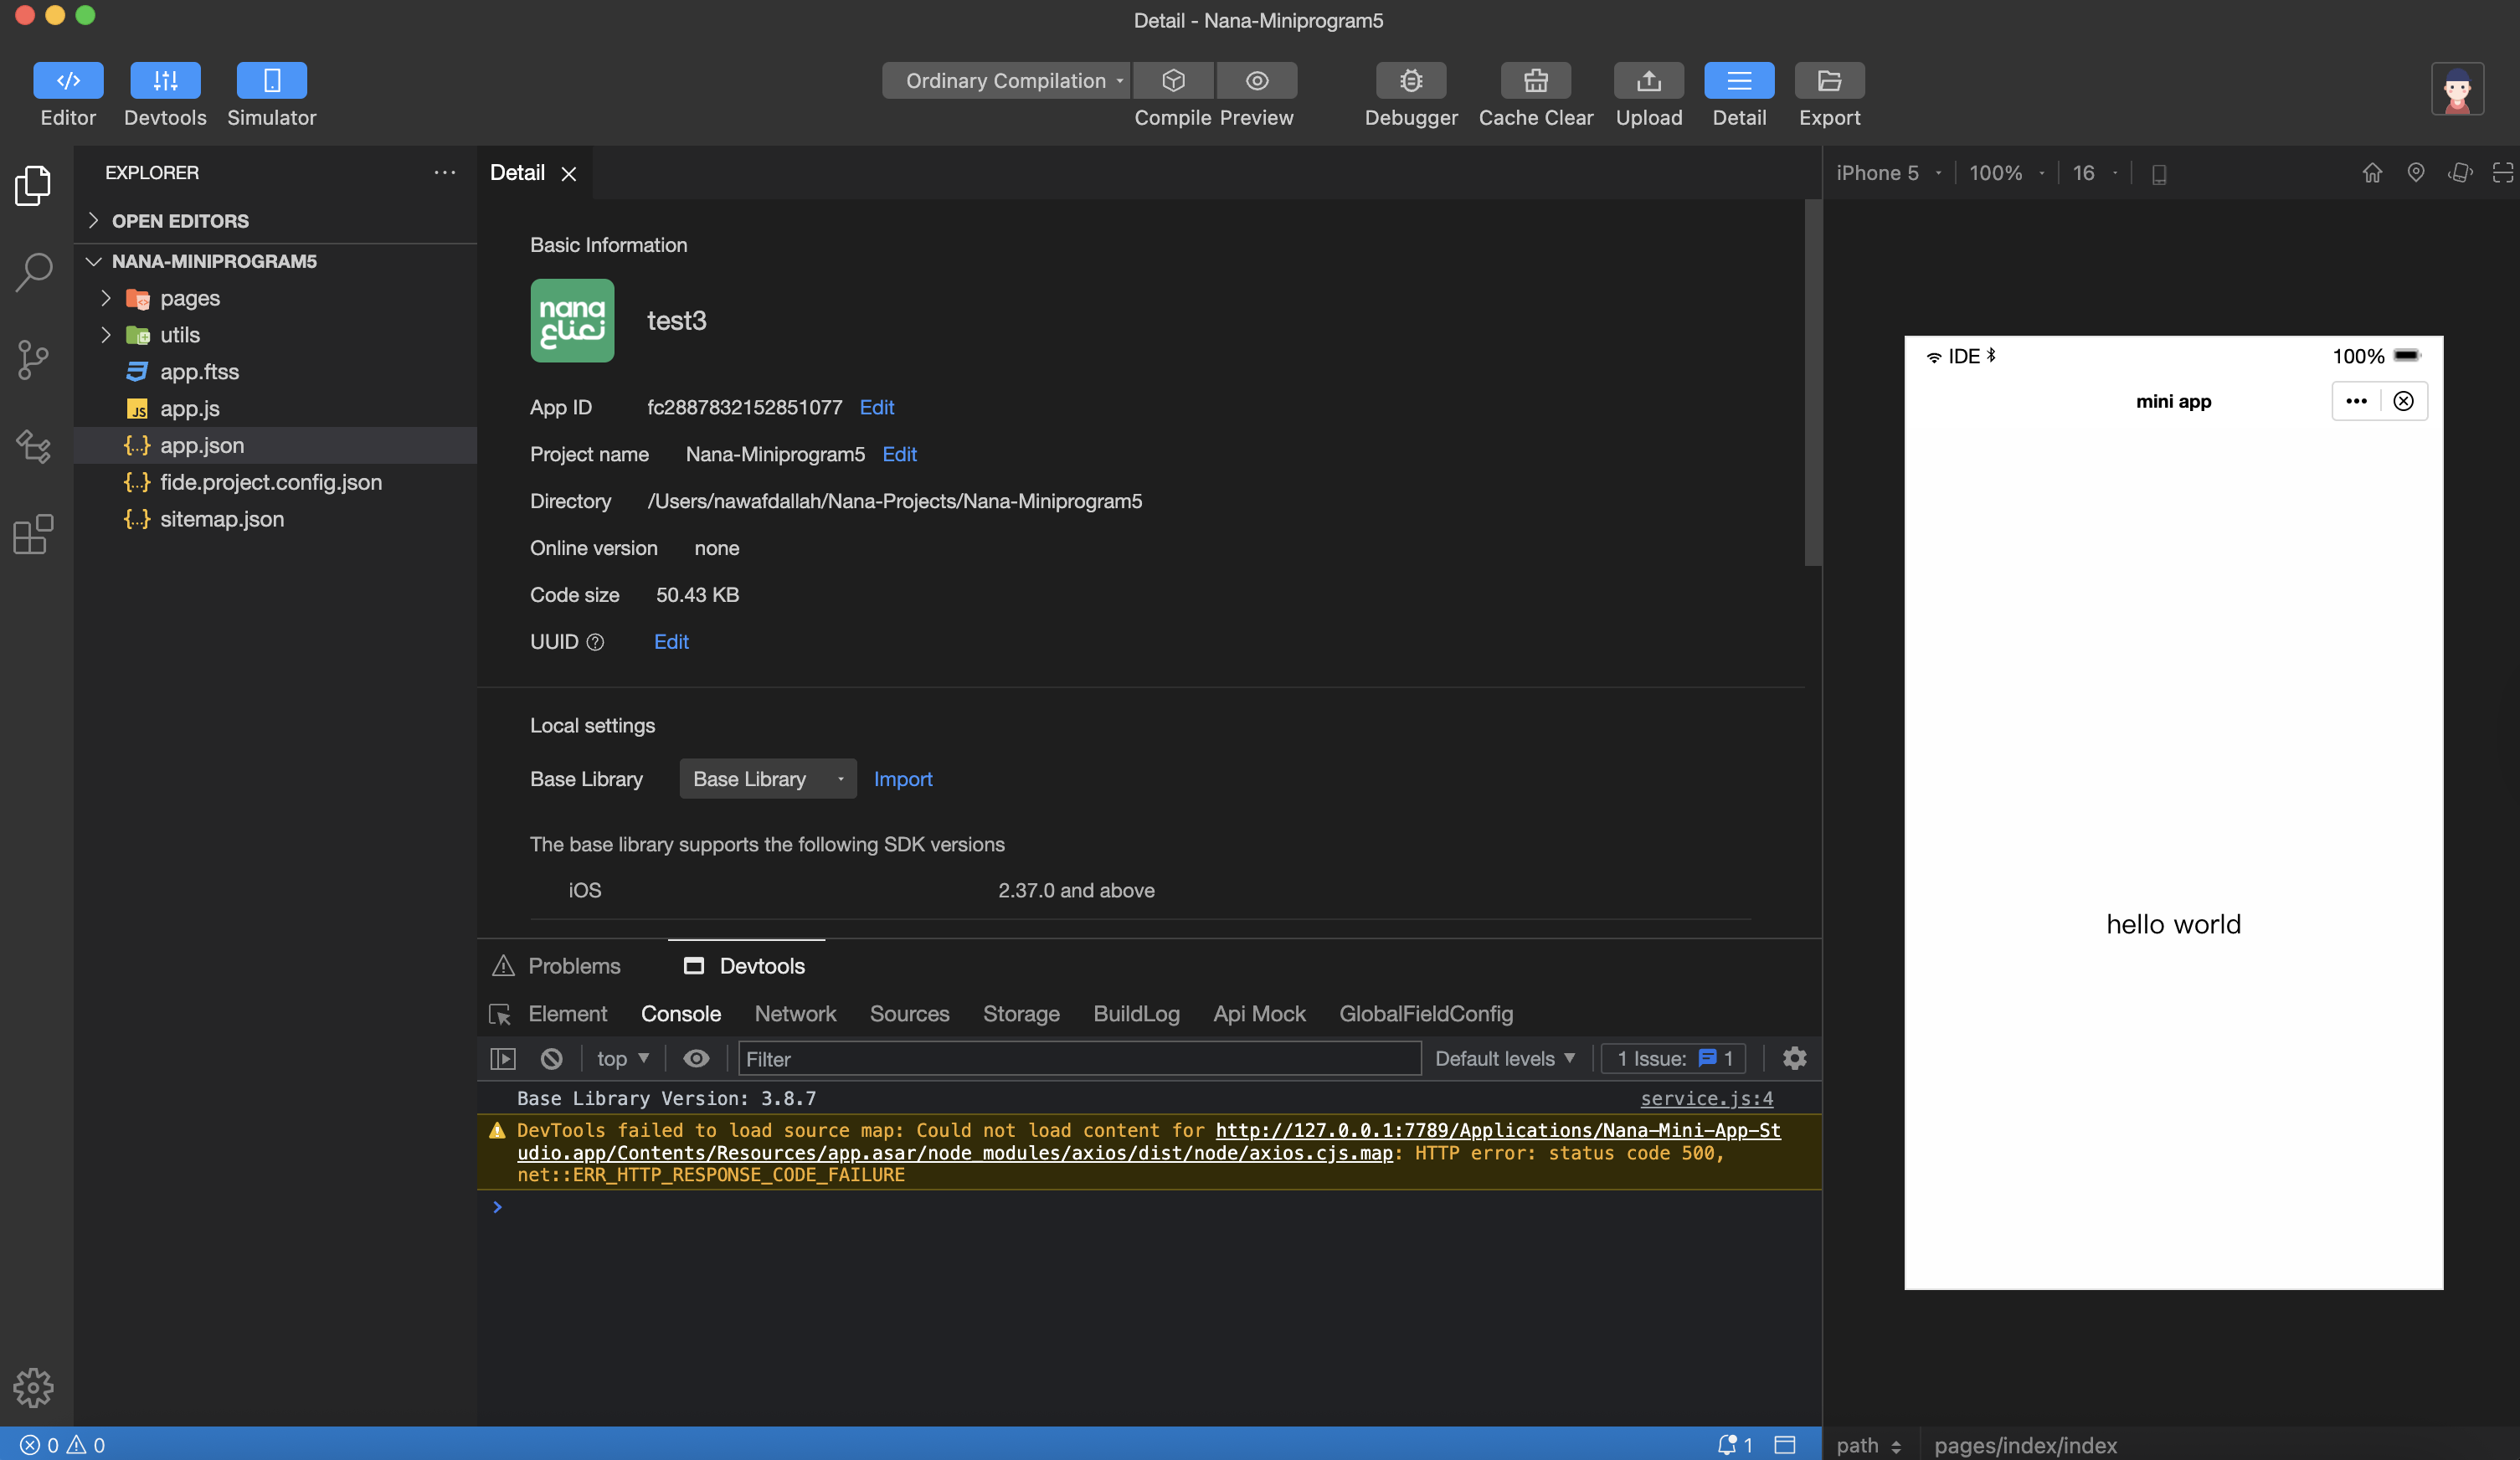
Development Environment
Main Interface
The MiniApps Studio provides a comprehensive development workspace with integrated tools for coding, debugging, and project management.
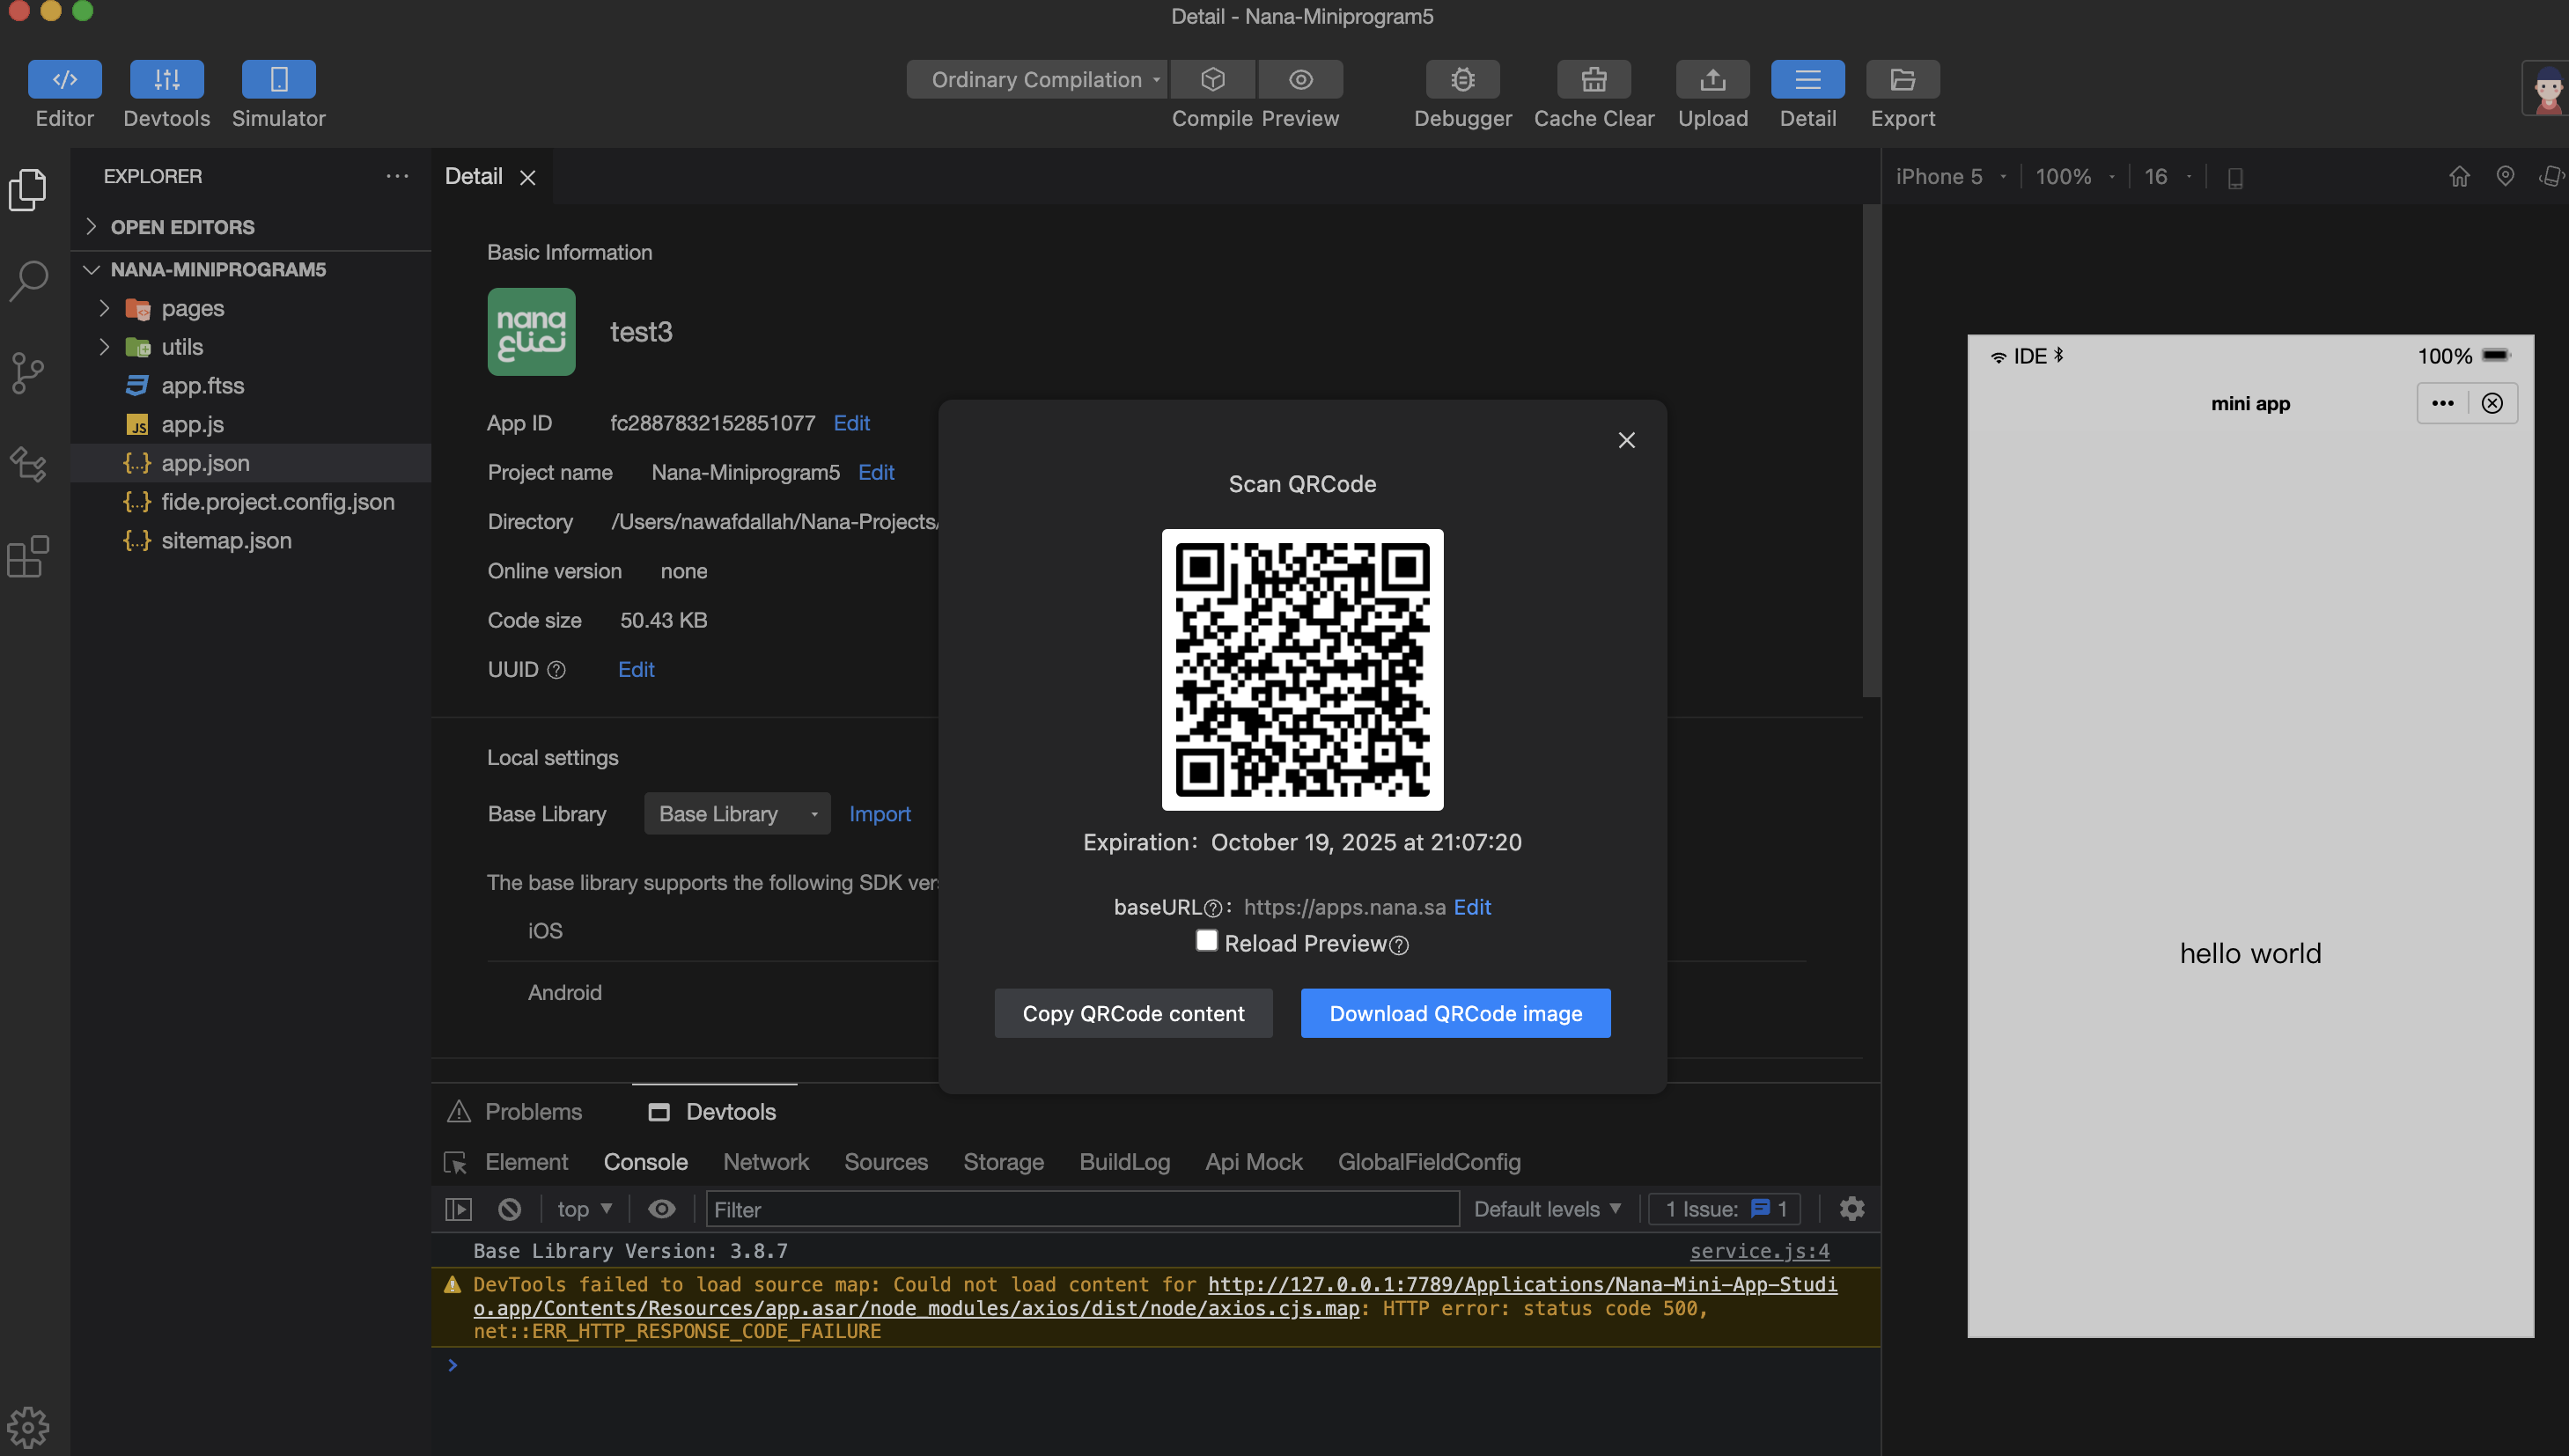
Testing and Preview
QR Code Testing
The integrated QR code feature enables real-time testing on mobile devices:
- Generate QR Code: The IDE automatically generates a QR code for your current development build
- Mobile Testing: Open the Nana app on your mobile device
- Scan Code: Use the QR code scanner within the Nana app
- Live Preview: View your MiniApp with live updates and real data integration from the super app
This feature allows developers to:
- Test real-time changes instantly
- Validate data flow from the super app to your MiniApp
- Ensure proper functionality across different device configurations
- Debug user interface and user experience elements
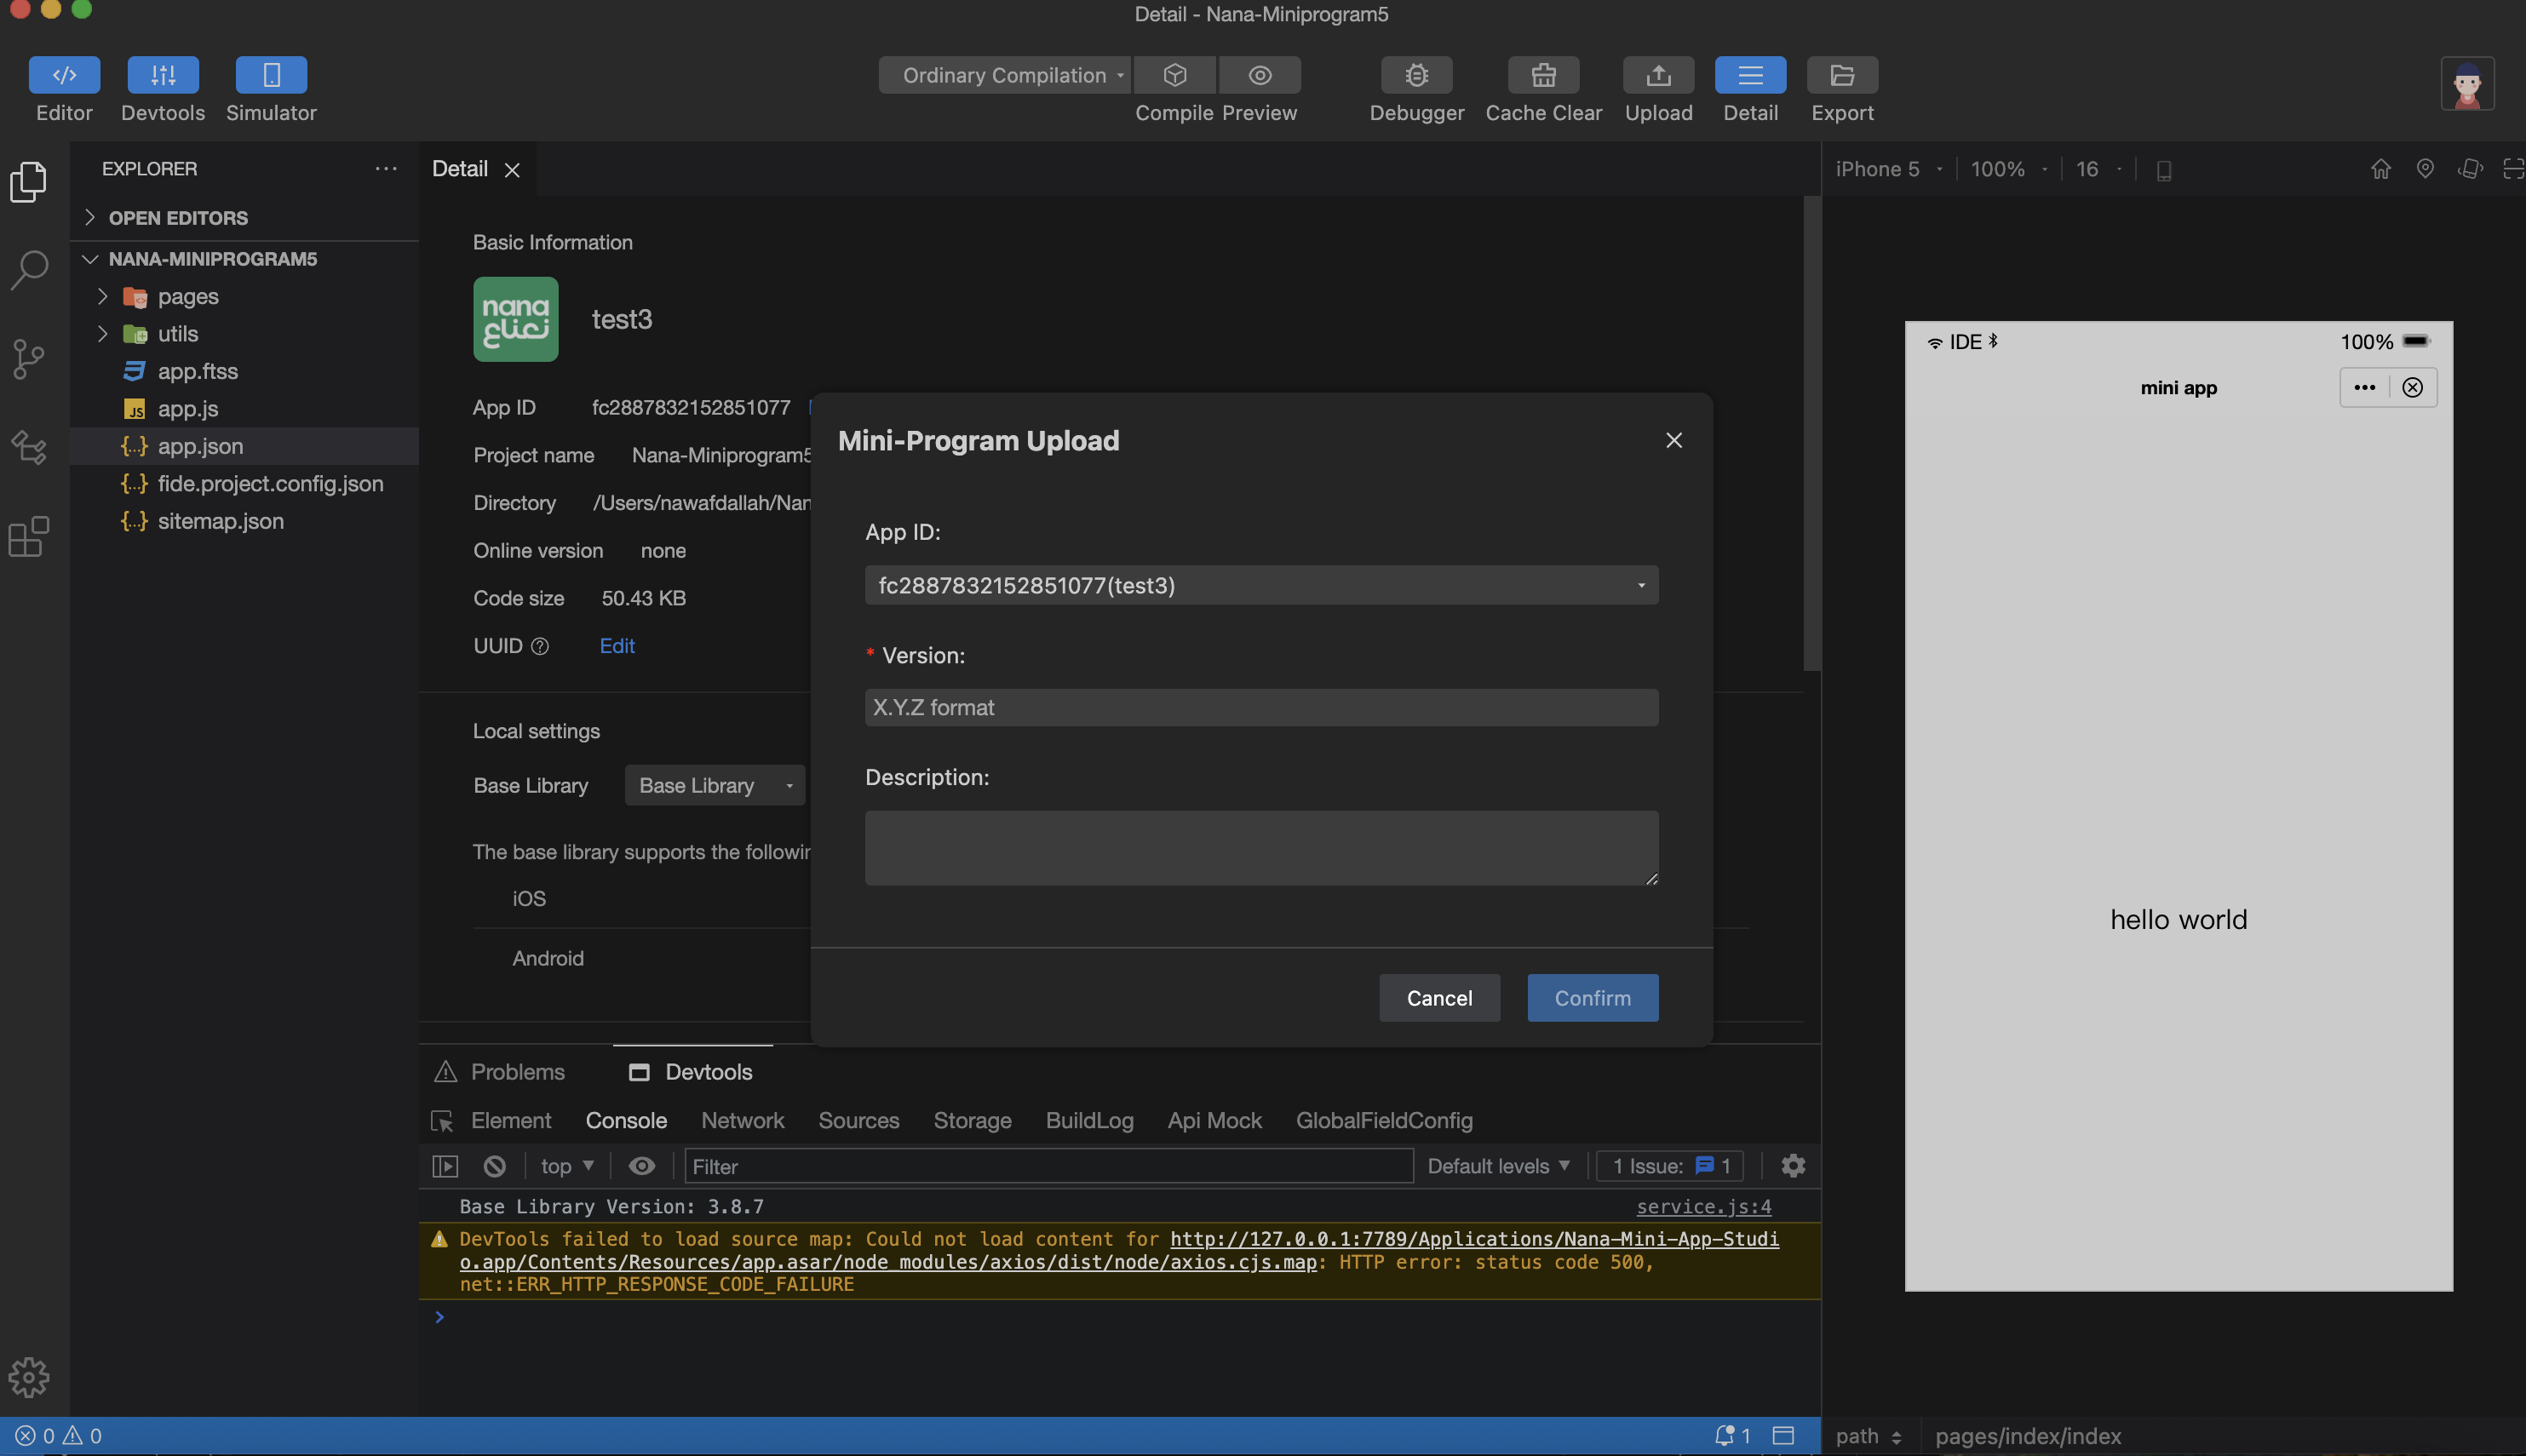
Deployment
Version Management and Upload
Deploy your completed MiniApp directly from the development environment:
- Version Control: Specify the version number for your release
- MiniApp ID Validation: Ensure correct MiniApp ID association
- Upload Process: Initiate the upload to the Nana platform
- Deployment Confirmation: Confirm successful deployment
Next Steps
After setting up Nana MiniApps Studio:
- Explore Templates: Familiarize yourself with available project templates
- Review Documentation: Check out our comprehensive API documentation
- Join Community: Connect with other developers in the Nana developer community
- Start Building: Begin your first MiniApp project
For additional support and resources, visit the Nana Developer Portal or refer to our comprehensive API documentation.
Updated 9 months ago